Tuesday, September 29, 2009

Cricut T-Shirts Made with Freezer Paper Stencils - Tips and Questions


One of my very favorite things that I've done with my Cricut Expression since I got it is using it to cut stencils for t-shirt painting. The shirt on the left is an example of one I recently finished. (My daughter's BF is on the school's cross country running team.) I've made several so far and learn something new each time I do it. I still have lots of questions though (below), can anyone help?


The Basic Steps:
1) Cut out your design using your Cricut onto freezer paper.
2) Iron freezer paper to t-shirt.
3) Paint shirt.
4) Let dry, remove stencil.

That's it! Of course, I've learned several things along the way. Here are some my tips so far. If anyone has any tips, please let me know. I've also found several blog posts and videos which are inspiring and informative, and I'll share those links as well.

My tips:

  • Double and triple-check your design before you cut. If you have text you need to make sure your words are flipped because you cut your design on the wrong side of the freezer paper. 
  • I learned that in SCAL you have to type your word backwards, then check the "flip" box in order to have it properly oriented. I believe this is resolved in SCAL 2 however (waiting for MAC release!!!)
  • Take the extra time to align your design on the t-shirt before you paint. I haven't worked out a good alignment method yet, but in the meantime I'm trying not to rush this step and just eyeballing it real good.
  • Use Tulip Soft fabric paint. It has a wonderful soft hand and great coverage. Since I'm new, I can't speak to how it holds up from repeated washings. But I love how opaque the paint is, even on dark colors. In the shirt above I used platinum metallic and white paint, on a black t-shirt, and you can see how nice it covers. I did use two coats (really only necessary for the white paint). Click on the close-up at left to see how nice the metallic paint looks.
  • Stock up on t-shirts at Michael's when they are on sale.
  • Allow time for the shirts to dry before removing stencil. This is the most important step in getting a professional clean look. I let the shirts dry overnight.
My Questions:
  • Has anyone used a transfer medium like vinyl transfer tape, magic mesh, or drywall tape to transfer the design? In the design above, it would have been very useful to use transfer tape because of the little tiny pieces in the word "Knights," but I think I would have had to cut it in vinyl because the design has to be flipped. Any thoughts on transfer tapes and their applications? Will using transfer tape help me when I have a design that must be cut in reverse and backwards - or must I use something that is cut in the same position in will be applied to the t-shirt?
  • Does anyone have experience layering multiple colors? I'm interested in tips on masking, layering and setting up registration points on the shirt.
Inspiring Projects
A list of blogs and videos I've found which either have nice projects or helpful information. Not all are cut with a Cricut.

Saturday, September 26, 2009

Tampa Bay Fashion Week 2009


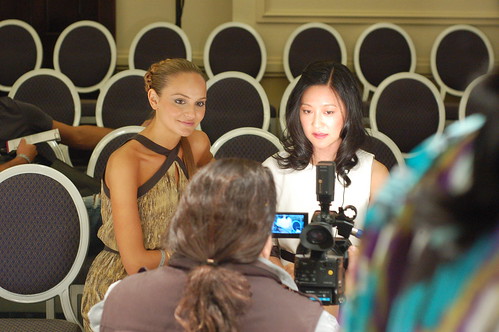
There was a fashion week. In Tampa. Surprised? Tampa tries hard to be fashionable. We have two fancy malls less than a mile apart and even a fashion design school. (You'd think I could find a job here - but, nooooooo). Anyway, Lizzy and I attended the Friday night show last night on Visit Tampa Bay's dime. It was fun. It was free. We saw Judy Crowell and her husband Paul Deasy from QVC and HSN. We also saw Victorya Hong and her model Jacqueline from season 4 of Project Runway. We got lots of free crap goodies.

But don't worry New York and Paris, you are in no danger. From what I saw, Tampa won't be rocking the fashion world anytime soon, despite what Cloe Cabrera says. And don't scoff - despite my casual uniform of jeans and a t-shirt I did have a career once upon a time at Elle, so I know what I'm talking about, a little. ;) Designers went crazy with cheap trims and ribbon. And there were some unfortunate flashbacks to the '80s. I took a few pics of the outfits but you can see them better here - *tbt*.  (That's Lizzy rocking the red carpet)


Best outfit was from another designer, Bebe Ziegler, who makes really awesome designer t-shirts. Her show was the day before, but she was in the audience sporting her Jester t-shirt. "I die" (channeling Rachel Zoe. I had to get at least one reference in, sorry!)


Judy Crowell & Paul Deasy


Victorya Hong and her model Jacqueline from Project Runway, season 4.

Wednesday, September 23, 2009

4 down...96 to go

I've had my Cricut Expression for about two weeks now and I luuuv it! I only have four cartridges, but would like to get a few more at some point. I've been cutting vinyl and making car decals, t-shirt painting with freezer paper, and even some cards and scrapbook pages.

Did you know Cricut has 100 cartridges? WOW! I'm entering a Provocraft contest - so please check out cartridge #100. This looks really cool, I love the 3-D buildings.

Wednesday, September 16, 2009

Ed Hardy-Inspired Tattoo Card


I'm tired. So tired as I write this post. Emotionally and physically. Tomorrow is the memorial service and internment (I probably spelled that wrong). It's going to be a long day as the internment will be at the Florida National cemetery which is at least an hour and a half away. I've been doing a lot (everything) to get ready for this. Cooking, organizing, phone calls, etc...

Anyway, it's not all bad. We've had such an outpouring of love from our church that it's a little overwhelming. The service will be nice, and maybe I'll sleep tomorrow night for the first time in a while. Next week Olivia has to have a brain MRI for some vision problems she's been having. So actually I may not get any rest for a while. Pass the ativan.


On to the card. A very nice lady gave me her Ed Hardy purse after I complimented her on it. As a thank you, I made the card above. I used my new Cricut Expression to cut the heart and sentiment, and handcut the white tattoo-style banner. The gold is stamped using Tim Holtz stamps and foiled with my Stampee foils (look for a review of that stuff next week). I'm so happy with this card because a) it's the first crafty-thing I've made in a while and 2) I did what I want without feeling like I had to buy anything to do it. I was inspired by a similar card made using the Cricut Indie Art cartridge, but I didn't have the money to buy the cartridge, even though I know I'd use it a lot. I went through my supplies and realized I could get the look I wanted with supplies I've been hoarding. Isn't that a great feeling? The red heart is stamped with a flourish stamp and the wings are from a set of chipboard pieces. I'll look up the manufacturer if anyone is interested, I just don't happen to remember.

Monday, September 14, 2009

Update

My grandma died this week. She'd been sick for quite a while, and lived with us so that we could help take care of her. I haven't been able to do much crafting or anything for a few weeks now but I have lots of ideas.

She was a remarkable lady (as most grandma's are) and we'll miss her very much! The photo is of some balloons we released at her favorite spot the day she died.